

Installing NVIDIA Tesla Drivers on Ubuntu
After purchasing various NVIDIA Tesla accelerators from previous generations - such as the NVIDIA Tesla K80 and NVIDIA Tesla M40 - I encountered difficulties concerning the driver installation for these cards related to my Ubuntu Server installation.
The Ubuntu repository sources already contains drivers for the relevant cards. However, I could not get these to work properly. The solution was to download the drivers locally and perform the installation process directly from this source.
All involved steps in getting the NVIDIA (Tesla) drivers to work are described in this article. There will be no messing with remote repository sources, or any other shenanigans. This is a straightforward step-by-step guide to installing the drivers.
Step 1: Acquiring the Relevant Sources
There are two sources required for completing the installation properly:
- The NVIDIA website to manually download the drivers for your operating system and GPU-model.

NVIDIA driver download page.
- The NVIDIA Driver Installation Guide
NVIDIA driver installation guide.
What not to use
Then there is also the NVIDIA CUDA Installation Guide, which is referenced from almost all of the driver pages.
This manual contains instructions irrelevant to the driver installation, only required for development purposes. The referencing of this page should be ignored and likely is caused by a URL change, as mentioned in this guide.

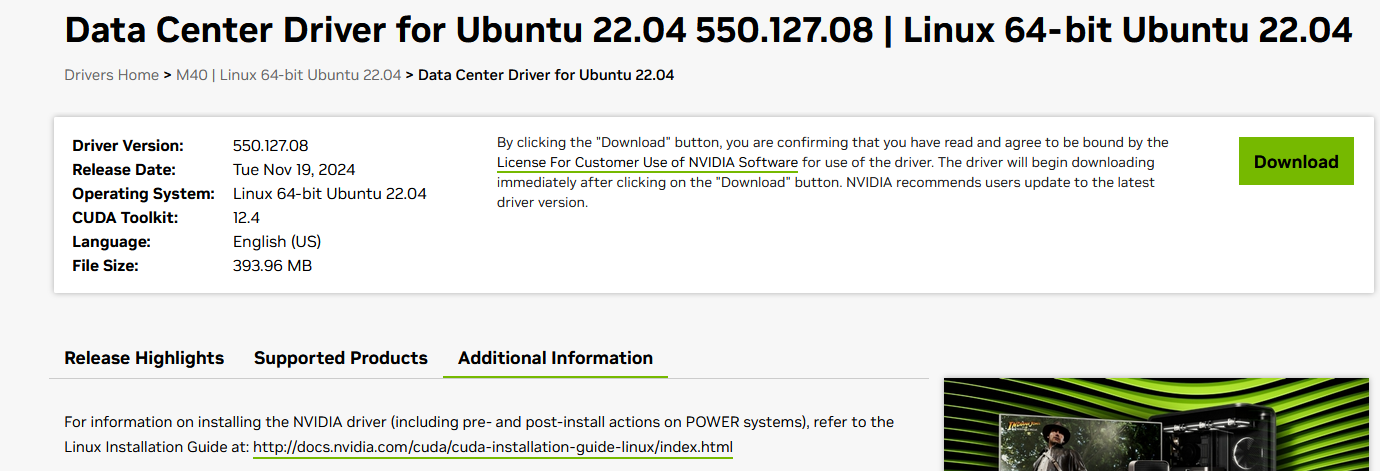
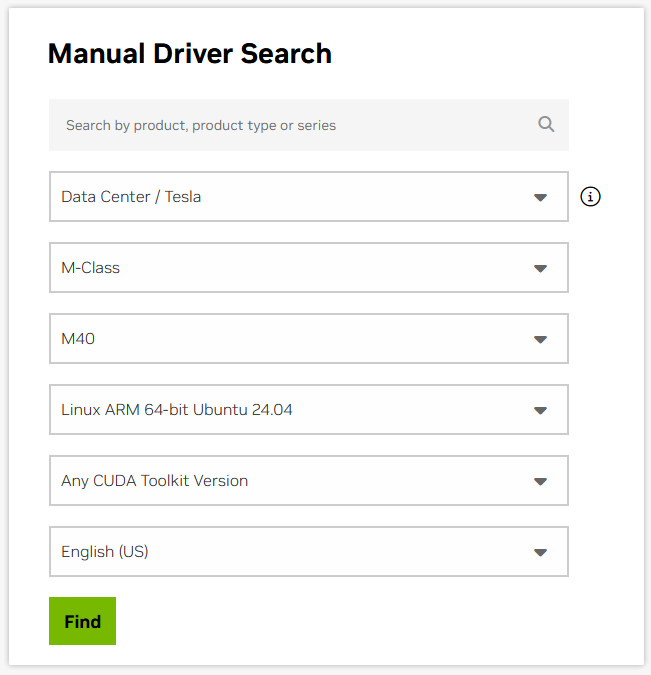
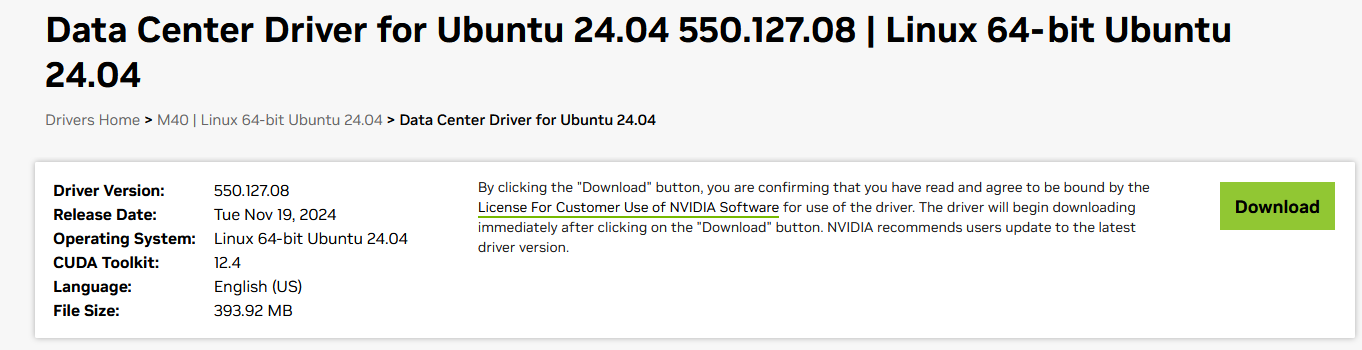
Step 2: Download the NVIDIA Driver
On the earlier mentioned source, fill in the details for your graphics card and operating system.
If the version for your operating system is not listed, it will likely not work. I encountered this for the NVIDIA Tesla K80 driver, which I wanted to get working under Ubuntu Server 24.04 LTS. In the end I gave up and downgraded my Ubuntu Server distribution.
You can download the relevant driver using wget when not using a GUI
Do not perform the installation of this package yet. This will be performed in step 5.
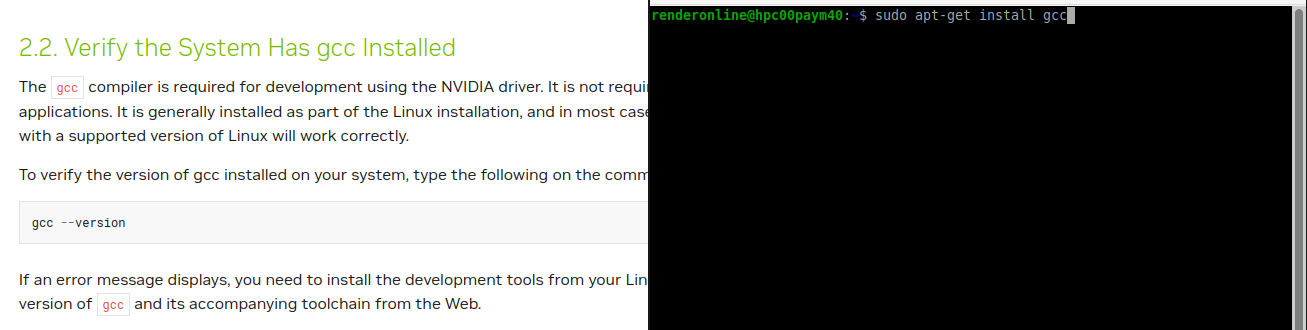
Step 3: Install the GCC Compiler
The installation of the gcc-compiler is mentioned as a pre-requisite. It might not be required, based on the description that mentions it to be "required for development". However, I performed the step, so I am obligated to include it in this guide.
Verify whether the gcc compiler is installed.
gcc --version
In my case, it was not. Execute:
sudo apt-get install gcc
Step 4: Installing the Kernel Headers
Execute the following command:
sudo apt-get install linux-headers-$(uname -r)
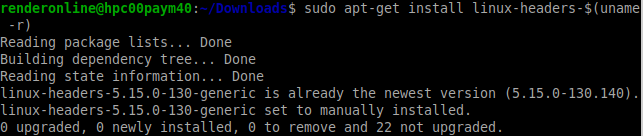
This will install the kernel headers and development packages, required for the next steps.
Step 5: Install the Debian Package
Use dpkg to install the Debian (.deb) package you (may not have) downloaded in step 2:
sudo dpkg -i <file_name>.deb

The output of this installation command will provide you with a new command to execute. This command copies a keyring to your machine related to this specific driver package. It will adhere to the following format:
sudo cp /var/nvidia-driver-local-repo-<distro>-X.<version>/nvidia-driver-*-keyring.gpg /usr/share/keyrings/

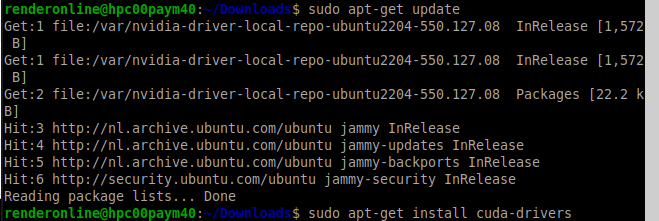
Step 6: Perform the Installation
The previous steps prepared a local repository source for the driver installation.
First update the APT repository cache:
sudo apt-get update
Then perform the installation:
sudo apt-get install cuda-drivers
Step 7: Reboot
Reboot the computer:
reboot
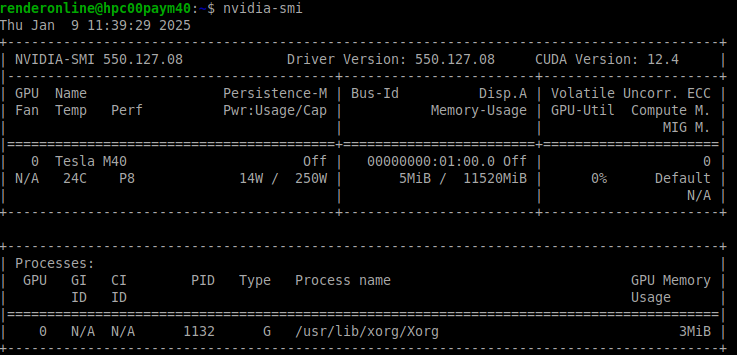
Step 8: Validate Installation
Validate whether your installation was successful by executing:
nvidia-smi
A similar string to the information below should be outputted on the page.
Conclusion
Hopefully this article will prevent a headache from messing with the NVIDIA drivers and repository sources. The final installation process is not difficult. However, it could be more intuitive...
Member discussion